
A Step-By-Step Guide to Building Your Own Personal Blog, Part 1
With Next.JS, React.JS, TypeScript, Sanity.io, and TailwindCSS


Table of contents
What We're Going To Build
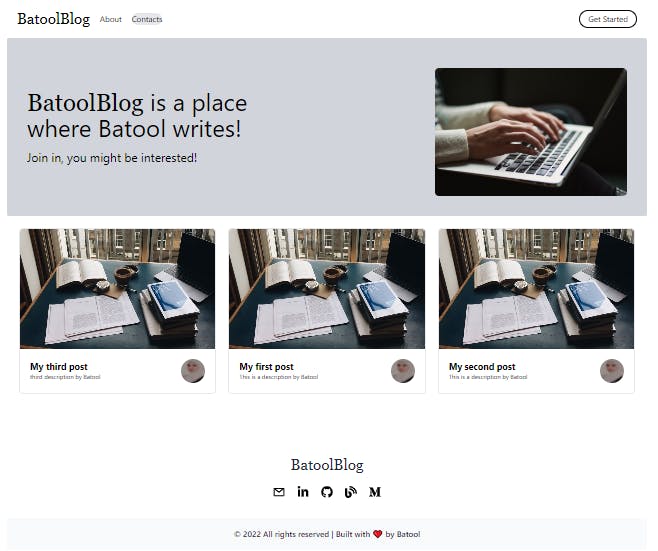
In this tutorial, which is split into two parts I'm going to walk you through the steps of building a full-stack blog website with Next.JS, React.JS, TypeScript, Sanity.io, and TailwindCSS for the styling.
In the image below you're seeing the final UI.
And now let's get started!
Prerequisites and Requirements
- Node.js installed on your device, and you can easily download it here
- Basic to intermediate knowledge with JavaScript or TypeScript.
- Familiarity with React.JS and Next.JS.
- Basic to intermediate knowledge on CSS.
- Text editor, preferably V.S Code.
- Git installed on your machine, and having a GitHub account.
- An account on Vercel as a hoisting platform.
Initialization
Create a GitHub Repo
Go to your GitHub account and create an empty repo, and leave it empty for now we'll get back to it in a second.
Create a Next.JS App
Cd into your preferred directory and type in the following command to create a Next.JS app, styled with tailwindCSS:
npx create-next-app --example with-tailwindcss <your_project_name> //my project name: batoolblogCd into your Next.JS app and type the following commands on your terminal to push the app into your empty repo: I found out that pushing to GitHub early is better for avoiding issues that might arise later
git init
git add .
git commit -m "first commit"
git branch -M main
git remote add origin the_url_you_copied_that_ends_with_git
git push -u origin main
Install Sanity.io and Create a New Project
Cd into your Next.JS app and install sanity.io, using this command:
npm install -g @sanity/cliCreate a sanity.io account, by logging in with your g-mail or GitHub accounts.
Click on the Create new project button on the user dashboard and then cd into your Next.Js app on the terminal to run this command:
sanity init --coupon sonny2022After running this command you'll be encouraged to login into your sanity account or you can simply use
Sanity loginprior to it. You'll then be asked about what to name your project, and whether you want to use the default dataset or not, and for this guide you're recommended to choose (y), after that you have to choose a project template --> Blog (schema)While it's resolving dependencies on the terminal, if you go to your Sanity.io account you'll see that the new project is added there.
After it's done installing everything on the terminal you'll be able to see a new folder with the same name you picked. And this is where the sanity studio will live.
For this part, I encourage you to push to your GitHub repo, but you might face an issue with
git add .therefore; open your Next.JS app withcode .and go to .gitignore and add<<your_project_name>>/node_modulesunder dependencies, just as in the picture below, then you'll be able to perform ACP correctly. My sanity project is: batblog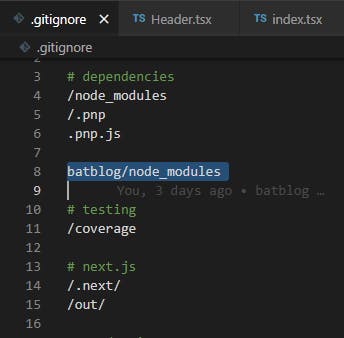
Run Your App
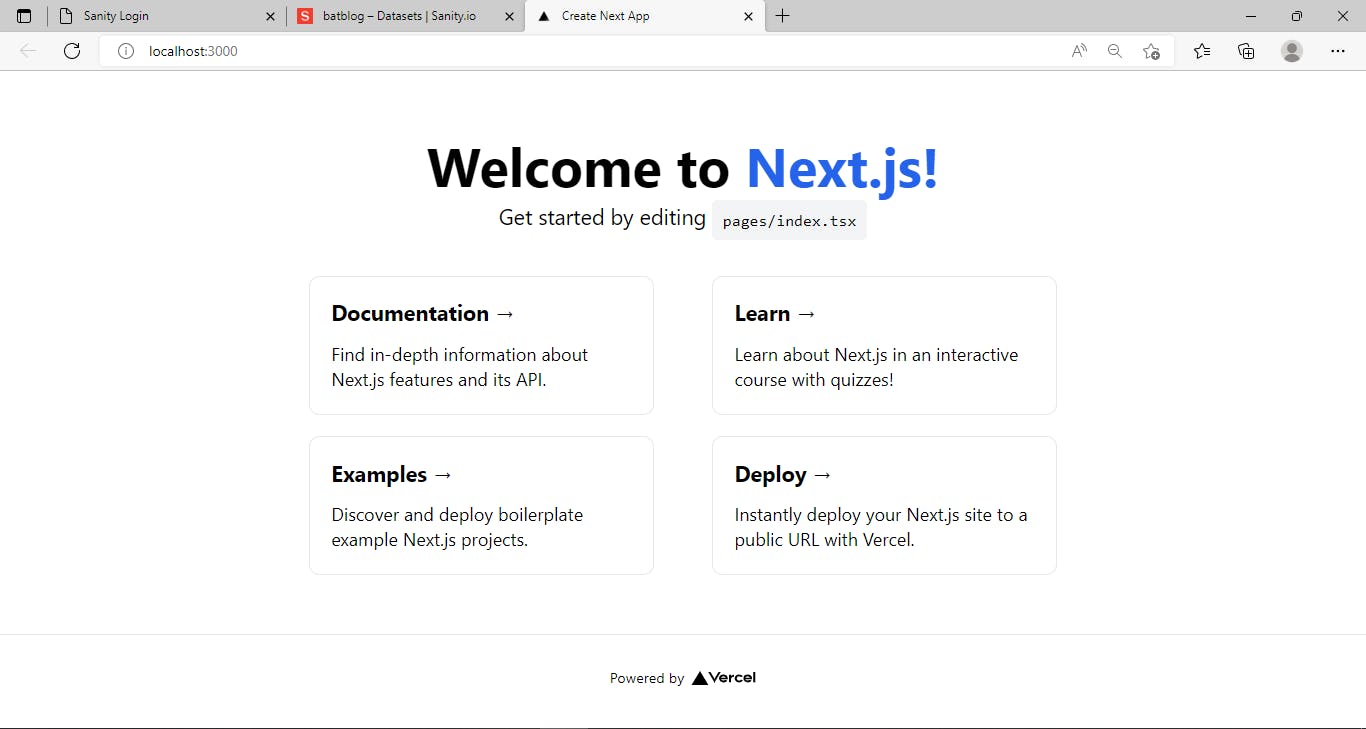
Cd inside your Next.JS app and run this command:
npm run dev
You'll see this page, which confirms that your app is working correctly.
Kick-Start The Building
Components
Create a components folder inside your Next.JS project directory mine is:< batoolblog > and inside this folder, create a Header.tsx file and fill it up by typing rfce which will create a React function for you, if you have ES7+ React/Redux/React-Native snippets installed on your VS Code.
// Inside "Header.tsx"

import Link from "next/link";
import React from "react";

function Header() {
 return (
   <header className="flex justify-between p-5 mx-auto max-w-7xl">
     <div className="flex items-center space-x-5">
       <Link href="/">
         <h1 className="font-serif text-3xl cursor-pointer">BatoolBlog</h1>
       </Link>

       <div className="items-center hidden space-x-5 md:inline-flex ">
         <Link href="/#about">
           <h3 className="rounded-full cursor-pointer hover:bg-gray-200 ">
             About
           </h3>
         </Link>
         <Link href="/#contact">
           <h3 className="rounded-full cursor-pointer hover:bg-gray-200">
             Contacts
           </h3>
         </Link>
       </div>
     </div>
     <div className="flex items-center space-x-5 text-black">
       <Link href="#posts">
         <h3 className="px-4 py-1 border border-black rounded-full cursor-pointer">
           Get Started
         </h3>
       </Link>
     </div>
   </header>
 );
}

export default Header;
Create another file for the footer inside the components folder and name it Footer.js:
// Inside Footer.js

import React from "react";

import { AiOutlineMail } from "react-icons/ai";
import { FaLinkedinIn, FaGithub, FaBlog, FaMediumM } from "react-icons/fa";

function Footer() {
 return (
   <>
     <div
       className="flex flex-col items-start justify-around w-full h-auto pt-20 md:flex-row"
       id="contact"
     >
       <div className="p-5 ">
         <ul>
           <p className="pb-6 font-serif text-3xl text-center text-gray-800 cursor-pointer">
             BatoolBlog
           </p>
           <div className="flex gap-6 pb-5">
             <a href="mailto:batoolbtoush98@gmail.com">
               {" "}
               <AiOutlineMail className="text-2xl cursor-pointer hover:text-gray-600" />
             </a>
             <a
               href="https://www.linkedin.com/in/batool-ragayah/"
               target="_blank"
             >
               {" "}
               <FaLinkedinIn className="text-2xl cursor-pointer hover:text-blue-600" />
             </a>
             <a href="https://github.com/BatoolBtoush" target="_blank">
               {" "}
               <FaGithub className="text-2xl cursor-pointer hover:text-gray-600" />
             </a>
             <a href="https://hashnode.com/@batool" target="_blank">
               {" "}
               <FaBlog className="text-2xl cursor-pointer hover:text-blue-600" />
             </a>
             <a href="https://medium.com/@batoolragayah" target="_blank">
               {" "}
               <FaMediumM className="text-2xl cursor-pointer hover:text-yellow-600" />
             </a>
           </div>
         </ul>
       </div>
     </div>
     <div className="flex flex-col items-center justify-center p-5 text-center bg-gray-50">
       <h1 className="font-semibold text-gray-800 ">
         © 2022 All rights reserved | Built with ❤ by{" "}
         <span className="font-semibold cursor-pointer hover:text-blue-600">
           Batool{" "}
         </span>
       </h1>
     </div>
   </>
 );
}

export default Footer;
Just make sure to run this command to install the icons:
npm install react-icons --save
Setting Up Sanity Studio
To add our blog posts we'll use Sanity, as follows:
After logging-in into your Sanity account on your browser, go to the sanity project which you built earlier on your terminal.
Navigate to settings --> API settings.
Cd into your sanity project mine is: < batblog > and run the local sanity studio:
sanity startAfter which you'll see this on your terminal:

Visit the link and log-in into your sanity.io account, using your log-in method from before, mine was via g-mail:
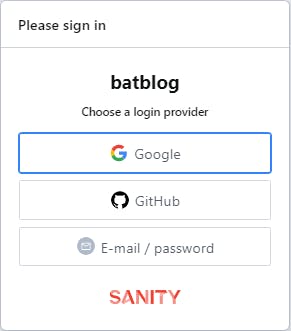
After logging in, you'll be able to see some sort of schemas, as such:
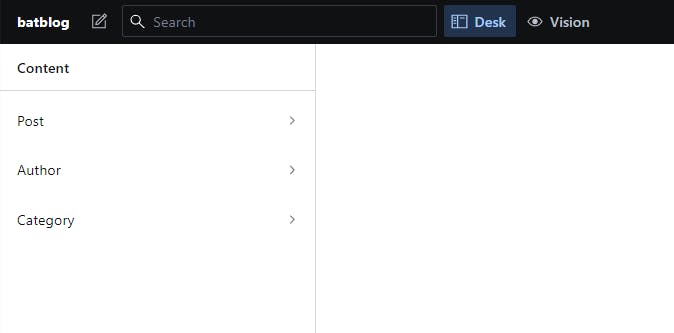
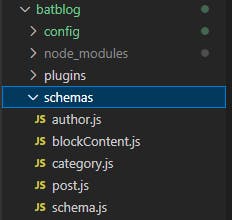
And those schemas can actually be found inside your sanity project in your text editor:
Create your posts and authors and Publish them from your sanity studio link that you got on your terminal earlier.
Fetching From Sanity Studio
In sanity studio on your browser, you can see a button labeled vision in the navbar, where we'll be able to query for our posts' data after clicking "fetch", as such:
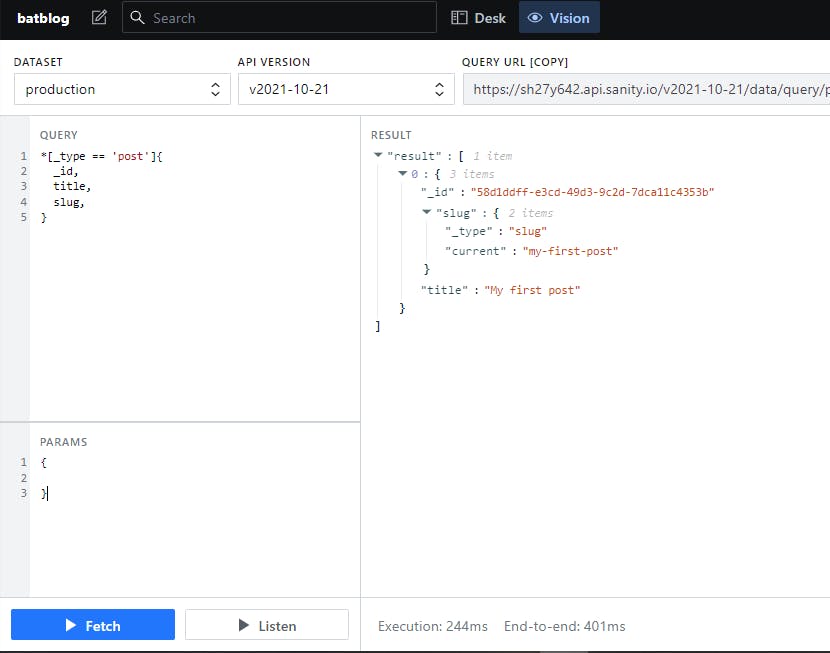
Let's say we wanted to query for the author's data, we would type this:
  *[_type == 'post']{
    _id,
    title,
    slug,
    author -> {
    name,
    image,
  }
  }
So now all we have to do is query for the posts' data in the frontend to be able to get them rendered. And how to do that? Just follow these steps:
Create sanity.js file inside your Next.JS app.
Install a new package but first make sure you're cd'ing into Next.JS project on the terminal, not sanity project, and type in this command:
npm i next-sanityPaste this code inside sanity.js:
// Inside sanity.js

import { createCurrentUserHook, createClient } from "next-sanity";

import createImageUrlBuilder from "@sanity/image-url";

export const config = {
 dataset: process.env.NEXT_PUBLIC_SANITY_DATASET || "production",
 projectId: process.env.NEXT_PUBLIC_SANITY_PROJECT_ID,
 apiVersion: "2021-03-25",
 useCdn: process.env.NODE_ENV === "production",
};

// This is to fetch data by making a query to the backend in sanity studio
export const sanityClient = createClient(config);

// This will parse the source we get back from the query and give us the image url
export const urlFor = (source) => createImageUrlBuilder(config).image(source);

export const useCurrentUser = createCurrentUserHook(config);
Install this package on the terminal:
npm install --save @sanity/image-urlIf you visit sanity.json in your sanity project on VS Code, you'll see your project's name, Id and other information. What you have to do now is add the dataset and project ID into your environment variables by creating a new file .env.local inside your Next.Js app:
// inside .env.local

// Take the dataset and project ID from "sanity.json" in your sanity project
NEXT_PUBLIC_SANITY_DATASET=
NEXT_PUBLIC_SANITY_PROJECT_ID=
To fetch from sanity studio, we're going to make use of Server Side Rendering, which means that when the user visits any URL in our project, we'll only be rendering (build on the server and deliver) that page per request. This is done by using getServerSideProps() and fetching from vision in sanity studio.
Example:
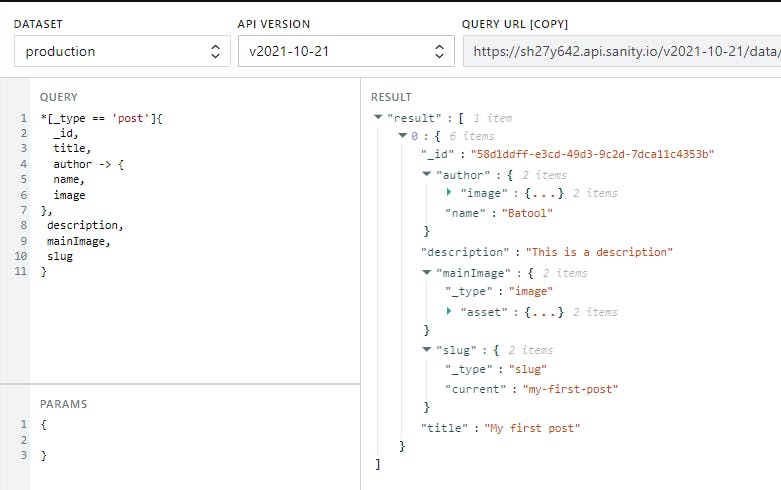
// Inside index.tsx at the very bottom

export const getServerSideProps = async () => {

 const query = `*[_type == "post"] {
   _id,
   title,
   author-> {
    name,
    image
   },
   description,
   mainImage,
   slug
 }`;
 const posts = await sanityClient.fetch(query);

// This is where we return the props
 return{
   props: {
     posts,
   }
 }
}
After returning the props, we need to pull it from the Home function at the top of index.tsx file:
// Inside index.tsx

import Header from "../components/Header";
import Footer from "../components/Footer";
import { sanityClient, urlFor } from "../sanity";

export default function Home({ posts }: Props) {

 return (
   <div className="mx-auto max-w-7xl">
     <Head>
       <title>Batool Blog</title>
       <link rel="icon" href="/favicon.ico" />
     </Head>

     <Header />
     <div className="flex items-center justify-between px-10 mx-auto space-y-5 bg-gray-300 rounded max-w-7xl sm:p-10">
       <div className="">
         <h1 className="max-w-xl font-sans text-5xl ">
           <span className="font-serif cursor-pointer">BatoolBlog</span> is a
           place where Batool writes!
         </h1>
         <h2 className="pt-5 font-sans text-2xl text-black">
           Join in, you might be interested!{" "}
         </h2>
       </div>

       <div className="items-center hidden md:inline-flex">
         <img
           className="h-auto rounded-lg w-96 "
           src="https://images.unsplash.com/photo-1508780709619-79562169bc64?ixlib=rb-1.2.1&ixid=MnwxMjA3fDB8MHxwaG90by1wYWdlfHx8fGVufDB8fHx8&auto=format&fit=crop&w=1470&q=80"
         />
       </div>
     </div>
   </div>
 );
}
But we'll see that we're going to get a new error regarding the newly added props; the error message:
 // Error message
 Parameter 'props' implicitly has an 'any' type.ts(7006)
And this means that we have to define what the props actually look like in addition to defining a type, and it's done by using (interface).
Create a typings.d.ts file in the main project level. This file is a definition TypeScript file and it's where we export our type:
// Inside typings.d.ts

export interface Post{
   _id: string;
   _createdAt: string;
   title: string;
   author:{
       name:string;
       image: string;
   },
   description: string;
   mainImage:{
       asset:{
           url:string;
       };
   };
   slug:{
       current: string;
   };
   body: [object];
}
Go back to index.tsx to fix the previous issue:
// Inside index.tsx at the very top

import { Post } from '../typings'

interface Props {
 posts: [Post ];
}

export default function Home(props: Props) {
 return (
           ..... <above code>
           )
}
Just to test out what we get from the backend. we de-structure the props and console.log it:
// Inside index.tsx

export default function Home({ posts }: Props) {
console.log(posts);

return  (
          ..... <above code>
          )
}
And we'll be able to see the data we queried for in the console or the terminal as such; (It's our post's data)
// On console or terminal

[
{
  _id: '58d1ddff-e3cd-49d3-9c2d-7dca11c4353b',
  author: { image: [Object], name: 'Batool' },
  description: 'This is a description',
  mainImage: { _type: 'image', asset: [Object] },
  slug: { _type: 'slug', current: 'my-first-post' },
  title: 'My first post'
}
]
Map through the posts' data, to get them on our frontend:
// Inside index.tsx

export default function Home({ posts }: Props) {

   return  (
              ..... <above code>

        {/* posts */}
            <div
              className="grid grid-cols-1 gap-3 p-5 sm:grid-cols-2 lg:grid-cols-3 md:gap-6 md:p-6"
              id="posts"
            >
              {posts.map((post) => (
                <Link key={post._id} href={`/post/${post.slug.current}`}>
                  <div className="overflow-hidden border rounded-lg cursor-pointer group">
                    <img
                      src={urlFor(post.mainImage).url()!}
                      alt=""
                      className="object-cover w-full transition-transform duration-200 ease-in-out h-60 group-hover:scale-105"
                    />
                    <div className="flex justify-between p-5 bg-white">
                      <div>
                        <p className="text-lg font-bold">{post.title}</p>
                        <p className="text-xs">
                          {post.description} by {post.author.name}
                        </p>
                      </div>
                      <img
                        src={urlFor(post.author.image).url()!}
                        alt=""
                        className="w-12 h-12 rounded-full"
                      />
                    </div>
                  </div>
                </Link>
              ))}
            </div>
                  )
  }
When we click on the image of the post, we'll get a 404. To fix this issue; have Next.JS make us travel to another page (the post's body); a dynamic page determined by the slug that comes from the schema in sanity studio. Move to the next section to learn how to do that!
The rest would be in Part 2 of this tutorial.